
Select camera shot
I usually scan your image and decide for myself in a flash which camera move works best. But sometimes you have a better eye for detail!
Do you want me to float across the hall right now? Or would you rather fly up on a façade like a drone?
Here I'll explain my camera menu to you so that you get exactly the effect you want.
Where can I find the camera settings?
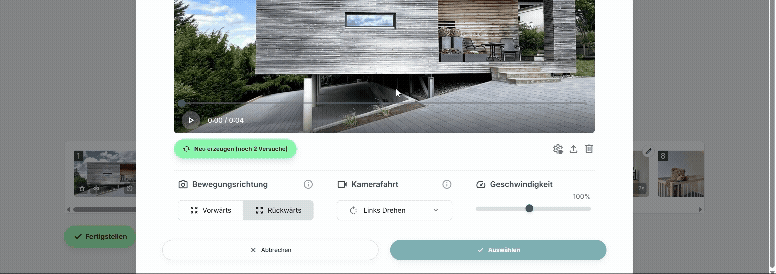
- In the editor, for a clip, click on the Pen (edit).
- At the bottom right, click on the Gear wheel with camera.
- In the Camera Move menu, you can see all my tricks.
Here's my cheat sheet on what the moves mean and when you should use them:
1. The classic: “Straight ahead”
Here I move straight into the picture (push-in).
- The look: Quiet, stable and clean.
- When to use Perfect for long corridors, looking into a deep living room or if you love symmetry.
- Tip: Make sure that the center of the image is the target.
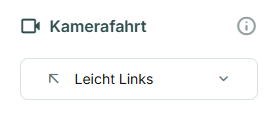
2. The slanted look: “Slightly left/ Slightly right”
I drive forward but drift gently to the side (pan).
- The look: This looks more dynamic than a rigid straight line.
- When to use Dial “Slightly left”if the highlight (e.g. the fireplace) is more on the left side of the picture. I'll head for it then. Dial “Slightly right”when the exciting part is more on the right.
3. The Hollywood feeling: “Turn left/right”
Here I'm taking a so-called “dolly shot.” I'm not just driving, I rotate the camera slightly around the center point.
- The look: The object in the middle remains fixed, the background rotates slightly. It looks very three-dimensional and elegant.
- When to use Ideal for Objects that stand freely in space (such as a dining table, a kitchen island, or an armchair).
4. The crane: “High” (Crane-Up)
I simulate a camera move that rises vertically upwards.
- The look: Majestic and revealing.
- When to use Perfect for flying up majestically on the house façade or impressively staging high ceilings and galleries in the interior.
- Tip: If you set the direction of movement to “backwards”, it will be a landing from top to bottom!
Marton's pro tip: The perfect “flow” (no ping-pong!)
A good video feels like one piece. So that your viewers don't get dizzy, you should go to the Harmony between clips pay attention.
Here is the mistake that many beginners make: The visual ping pong!
If you search for in the first clip links Swivel and immediately harden in the next clip Right Swivel, it looks very restless and hectic. The eye must constantly jump back and forth.
Here's how to do it like a Hollywood cutter:
Strategy A: The Buffer Technique (The “Straight Ahead” Trick)
If you want to change direction (e.g. from left to right), build a bridge!
Place a clip with the ride between the two clips “Straight ahead”.
- Bad: Easy left ➡️ Easy right (Too hard!)
- Perfect: Easy links ➡️ Straight ahead ➡️ Slightly right (buttery soft!)
The “straight ahead” clip acts as a neutralizer for the eye and soothes the image.
Strategy B: The flow
Try to maintain or just gently change movements across multiple clips.
- Do you have a series of outdoor shots? Then let them all gently into the same direction Glide (e.g. slightly right). It feels like a continuous journey around the house.
How to apply the change
Have you decided on a new journey (e.g. from straight ahead to high)?
- Be sure to click on the green button “Create new”.
- I am now completely recalculating the clip with the new movement.
- Do you like it? Then click “Select”.
Have fun experimenting!